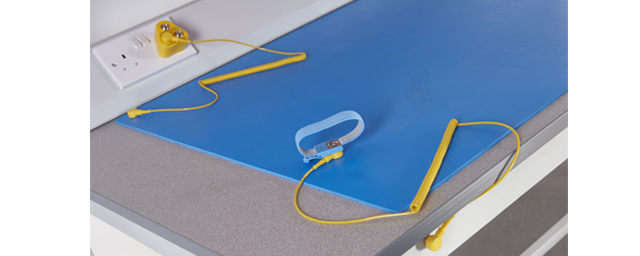
This article provides readers with a simple step by step guide to setting up an ESD Workstation. For more info on how to create a safe electric environment, please refer to our previous post here.
Staying Protected and Reducing the Risk with ESD Workbenches
To reduce the risk of static discharge igniting, there are standard devices to equip a workstation with. Known as anti-static devices. Such devices protect against static by preventing the build up of static electricity.
Setting up your ESD Workbenches
1. Choosing Your Workbench
The first decision to make is the choice of anti-static workbench you need. In most circumstances, the station will be in the form of a workbench. For an ESD Workbench, both Lamstat and Neostat worktops are suitable. Lamstat features a laminate worktop with a safe static-dissapative. Whilst the Neostat static-dissapative worktop has a dual-layer surface made of rubber.
2. Choosing Anti-static Accessories

Once you’ve decided on your ESD Workbench, the next step is to choose Anti-static devices. These accessories include:
Earth Ground Leads – provide a safe path to ground. Preventing the risk of electrostatic discharge through a Ohm Resistor. This is available with a 3 Pin Plug for use in conjunction with the worktop’s service duct.
Insulating Strip – this item is required with worktop service ducts. The strip prevents the build up of static electricity within the service duct.
Wrist Strap – the wrist strap is a recommended wear for users whilst working. It comes with a 10mm stud or 4mm banana to attach the Earth Ground Lead to permit a safe pathway to ground.
RCB Circuit Breaker – (short for residual current device), these help prevent serious harm. This item breaks an electrical circuit to provide safety in the event of a user touching something live.
Anti-static Mats – these type of mats control the speed that the electrostatic discharge flows. Rapid discharge runs the risk of damaging components that are sensitive to it.
